I'm thrilled to report that I purchased my fabric and chair batting at 50% off today! The total cost for materials for this project was $83.97 (tax included). The total also included a spool of upholstery thread that I purchased a few weeks ago for the project (not on sale). Not bad for everything to recover 10 chairs (including adding the extra padding!). We already own a staple gun and my husband has a huge stash of staples that he got for free years ago, so no additional cost for those :)

New chair batting to add more cushioning on top of the foam

The fabric is like a thick ultrasuede - not thin microfibre. It sewed beautifully with minimal fraying and no slipping (essential with these persnickety back corners to deal with!). The front corners were very easy - just a right angle (one easy seam).

The finished back corner stretched overtop the seat cushion... not perfect, but not too bad, either...

Top view of the pesky corner... Looks pretty good from on top...

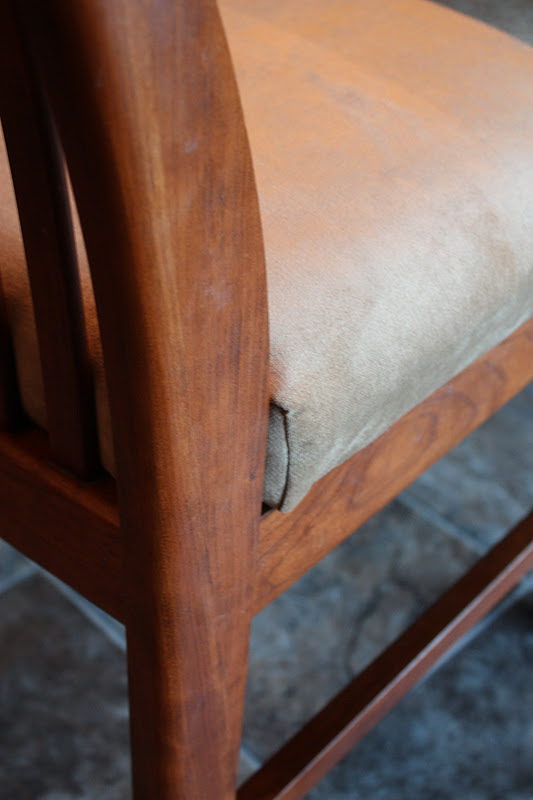
Old upholstery - back corner view
New upholstery, back corner view. I think on the next ones, I'll turn the seam to the inside of the corner. I had turned them out thinking that too much bulk in the corner would make it hard to position them securely but I'm sure that it will be fine to do that for the rest of the chairs.

Old and new (notice the extra padding on the seat - so much comfier!)
The learning curve was steep on the first chair - I had to redo a few things before it all pulled together, but now that all that figuring is out of the way, I can get going with an assembly line and get the rest done :) It's going to feel so good to get this job finished - it's been hanging over my head for months...
Wow, stitching the corners! I had just folded the fabric to fit nicely around the corners, but then the chairs I did didn't have the wonky back corners.
ReplyDeleteGood job! It looks great.
Yes, those corners are BRUTAL! The inset piece is SQUARE and you have to ease and pin like crazy to get it to fit into an L shaped cutout on the seat cover. Grrrr..... lots of fiddling!!!!
ReplyDeleteVery nicely done.
ReplyDeleteGood for you! The chairs are going to look and feel great!!!
ReplyDeleteAngie
Sherrie, this chair looks lovely..and so much cheaper too than buying another set or having them recovered professionally....What a money saver....My 3 seater lounge needs a good cover...but I'm not ready to tackle it yet.
ReplyDeleteWell done.
The chair looks great! Hope you had a great weekend!
ReplyDeleteThank you all! I now have 3 chairs done. Believe it or not, it takes an hour to remove all the staples from the original upholstery under the seat. URGH. They were absolutely trigger happy with the staple gun which makes for tough slogging to remove them. That has proved to be the hardest and most time consuming part of this project by far. I have a fourth cover sewn and I'm going to try and get the fourth chair dismantled and stripped while supper is cooking. IF I can finish the fourth chair today I'll be nearly half way done. Whew!
ReplyDeletehello
ReplyDeleteyour chair looks great after the makeover. my chairs need also a makeover.
blessings regina