Monday, 30 May 2011

Tomato and Pepper Hot Bed

Kelly worked very hard recently to prepare a better planting bed to grow our peppers and tomatoes.  His work will pay off well in better moisture and heat retention and less weeds which will all contribute to increased yield.  We had these timbers on hand so there was no expense involved, just time in plowing the area where the wood would sit and then setting, levelling and securing the timbers.  He did a great job and I am so thankful to have a husband who is so capable and knowledgeable.   He can do anything!  *swoon*


The soil was amended with kitchen compostables through the late fall and winter, so that was mostly decomposed.  I added some peat and a bit of blood meal and gave everything a good turning over before planting.  The soil looks and feels fantastic!  Good soil texture and much improved water retention will hopefully make this bed even more productive than last year.

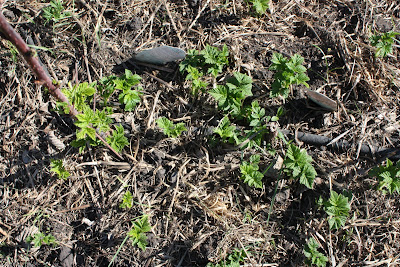
The plants you see in the middle of the bed are spinach, beets, kale and cilantro that were seeded in the cold frames.  The frames resided in this bed until last week but were removed to make way for the pepper and tomato "hot bed".   I planted peppers (Jalapeno and sweet) at one end (the lower part of the picture) and tomatoes at the other (the top of the photo).  The rest of my tomatoes are in the main garden as an experiment of sorts.  Last year, I was surprised to see that the tomatoes I had growing in the cooler, more open main garden did really well - as well as the ones planted in the hot bed (dare I say better?).   Hmmm...  must have been the soil condition.  Hopefully, we have taken care of that with our recent work on the hot bed and I'm curious to see if they take off as expected this year.  The combination of reflective heat, protection from wind and good soil *should* net a bigger harvest.

Last year, we lost nearly all of our tomatoes to an early frost.  I had been diligently watching the weather forecast, and with no frost predicted one late summer/early fall night, I didn't cover my tomatoes.  I woke to the gut wrenching discovery of all our tomatoes frozen on the vine and learned the hard way that temperatures out here in the country can run as much as 8-10 degrees cooler than in the city.  THAT was a hard pill to swallow.  Fortunately, a fellow gardener with a glut of tomatoes was kind enough to donate 2 large boxes of just picked tomatoes when she heard of our plight.  I was so touched by her generosity and kindness.

This year, I'm armed with knowledge and steely determination (what gardener doesn't have that?).  I will protect those plants like babies and hope that those efforts pay off.  Certainly, this improved planting bed will help and I hope that I can fill my pantry and freezer with delicious homemade tomato sauce :)  


This is one of many Pink Brandywines planted in this bed.  I've also planted Taxi Yellow and Tiger Stripe.  The plants look a little nitrogen deficient, so I'm probably going to have to add a little more blood meal to the soil.  When there is partially composted matter in the soil apparently nitrogen is in short supply as it is used up during the decomposition process.  When the composting process is complete, the nitrogen level rises.  These yellowish leaves tell me that I need to add a little more nitrogen, and as I don't use chemical fertilizers, my choice of nitrogen will be to add blood meal.   Hopefully, now that we have some decent composting systems set up, I'll be able to compost all of our organic waste fully before adding it to the garden beds, eliminating the cause of the low nitrogen in the first place.

On the house front, we are making progress getting the siding up at the rear of the garage. It's looking really good!  Pics will follow soon :) 


Triple It!

We decided at the very last minute to add another vegetable garden to our property effectively tripling our garden space from what we had last year.   I've run out of room in my main garden for planting squash and pumpkins and I'd really like to grow more corn and potatoes.   Corn takes up so much space for a fairly small yield, so I tend not to plant much of it in my main garden, saving the space for more productive crops.  With the addition of this new garden bed, I'll have lots of room for those bigger plants to roam and grow without shading out other crops and as a bonus, we can easily add on to this new garden bed next year should we need to - there's plenty of room!

We chose an area that is far away from the main garden, on the opposite side of the property, in full sun, and as a bonus, there is water to the site.  The crops I'll be planting will need very little in the way of daily attendance, just a quick check every few days plus watering and hoeing on a weekly basis.  Not too terribly time consuming so having it far away from the main garden shouldn't be a problem.

Kelly was busy plowing to break ground with the big diesel tractor and the kids helped to haul the cut sod off the area.  Tilling in amendments to the soil was light work with the tiller attachment on the rear of the small tractor.  We added peat moss to the whole area and some dry chicken manure to the half of the bed that will be planted with corn and squash.  I chose to leave the half of the bed where the potatoes will grow as an experiment.  Last year, our potatoes had some scab issues and I think it was due to the rich soil in the main garden.  I'm curious to see what happens with this crop in the new garden.

The time is finally nigh for planting squash and pumpkins.   I find if we wait until the VERY end of May to direct seed, the pumpkins and squash germinate quickly and grow vigorously, doing better than transplanted seedlings.  I've got a winter keeping squash, a summer longneck, plus an acorn variety.   I threw caution to the wind and planted a row of watermelons!  The potatoes were planted yesterday, as evidenced in the photo below and I was able to use up all of the gifted seed potatoes from my neighbour.  I just hated to see them go to waste so I'm really glad we were able to get this new garden in this year.  It was a huge project spontaneously added to our already busy to do list but will hopefully pay off in a very large winter store of potatoes :)


My parents are in town for 10 days and they have been a tremendous help!  Mom has tended the garden with me and she helped me set up my new potting area made from the base cabinets that my husband was able to get from work.  It's much more functional and neater looking that my previous set up, and it's a pleasure to work at with all my tools and pots handy, with excellent workspace for seeding and transplanting.  The photo below shows the location of the work area, adjacent to the gate.  The sprouting seeds are too small to see from the roof, but they're there!  That's our chicken coop at the back left of the photo, and the white fabric you see is the row cover for the brassicas.


This next picture is a continuation of the garden, the front of the coop now just visible with the hens resting in the shade for their afternoon sleep :)  The rolled up sod all along the chicken wire is to keep them from digging under fence to get into the garden!


This next photo shows the new hen run out under the fruit trees.  They love it out there, but as it's not as shaded yet, the girls retreat to the are closest to the coop for their afternoon rest.  :)


I'm considering investing in a wheel how now that my garden area is triple the size of last year's garden.  Hoeing weeds will be a major task for many, many weeks to come and with such a large garden, I'm concerned about keeping up. A wheel how will certainly make the job fast and less tiresome, freeing up my time to pick and can the (hopefully) bountiful harvest.  Do you have a wheel hoe?  If so, what brand is yours and do you like it?

Friday, 27 May 2011

Bread


The art of bread making is a very important skill that takes a little time to master.   It's worth it to get the knack of it, as having freshly baked bread made with whole grains is a wonderfully frugal way to feed your family good quality fresh food.  I am no master baker, and I certainly made a lot of "door stops" before I got the hang of making bread.  What I make now (after all that trial and error) passes for fairly decent bread :)

This recipe works very well for bread made with Hard Red Wheat.  It makes 4 big loaves that are great for sandwich bread and toasting.  I buy my wheat from a local organic farmer and I grind it right before baking, but you can easily use store bought whole wheat flour.

This is 14xmommy's Bread Recipe 

5 cups hot water (120 deg)
2 large eggs
1.5 Tbsp salt
2/3 cup oil
2/3 cup honey or sugar
approx 8 cups whole wheat flour to start (you'll add more at kneading time - likely another 8 cups)
1/4 cup instant yeast
1/4 cup vital wheat gluten *

Put wet ingredients into mixer and mix well.  Add flour, yeast and gluten.  Knead on low speed till blended well, then add more flour gradually a half cup at a time, until the dough pulls together and just begins to pull away from the side of the mixer bowl.  Knead for approximately 14-18 minutes.  Check for gluten development by pulling a piece of dough - it should be stretchy and thin when pulled, but should not break.  If it does, keep kneading till it's nice and stretchy.

Shape into loaves and place into greased bread pans.  Let rise slowly in a warm place (not too hot, though!) till doubled.  Proof by sticking your finger into the dough.  If it springs back, let it rise a bit more, if it doesn't, it's done rising and ready to bake.  Usually 30 minutes is plenty unless your house is really cool.

Place loaves into a 350 deg oven and bake for approximately 35-40 minutes or until golden brown and hollow sounding when thumped.  Remove from pans and let cool completely on wire racks before slicing.

Give it a go!  It's delicious :)


*  Edited to add - you may have to adjust the recipe to include more vital wheat gluten.  With the most recent batch of wheat I'm using, it needs 1/2 cup in order to get to the stretchy stage.  No matter how long I kneaded it, it wouldn't get there.   I now add 1/2 cup right at the beginning when I'm loading the mixer.  Every wheat will be different.  Start at 1/4 cup.

Saturday, 21 May 2011

Compost

I use a rotational system to make compost using garbage cans.  It's fairly effective if you layer the contents correctly, wet it regularly and turn the cans each week or so.  Unfortunately, I have no finished compost to show you as it's all been dumped into the garden, but I can show you how my crude but effective system works :)


First stop is the kitchen.  I keep 2 bins in the kitchen that are labelled so everyone knows where to put scraps.  The green bin is in my second sink and we use it for most of the scraps that we generate out of the kitchen - almost everything can go to the hens including plate scrapings, veggie and fruit trimmings, meat scraps (not chicken of course!), stale bread and crusts, etc.   The metal bin is kept on the counter between my coffee maker and the stove.  This is where we generate the compostable waste that can't go to the chickens (coffee grounds, filters, tea bags, orange peels and egg shells).   If you don't have chickens, be sure to NOT include meat and dairy scraps in your compost - it WILL attract rodents.


Next stop is outside!  We drilled holes into the bottom of 3 garbage cans to provide drainage, and then we placed the cans up on blocks of wood (you could use cinderblocks or bricks) to provide good ventilation.   Choose a location that is fairly sunny so that your compost will cook faster and give you finished compost sooner :)

Begin by layering dry brown ingredients at the bottom (leaves, chopped up twigs, etc) and then alternate dry brown layers (paper, leaves, twigs, etc) and wet green grass clippings or pulled weeds (not gone to seed) etc., or kitchen scraps.   It's like layering a brown and green dessert :)  Keep the quantities about equal, and remember to chop up anything bigger into smaller pieces so that it will break down faster.  I like to have a few bins on the go at one time because it gives me the chance to put the right ingredients into a bin in the right order.  For instance, if I come to the bins with a load of kitchen scraps, and the only bin I have going happens to already have a good layer of that on top, adding more will be too much.  If I have another bin going, it may have dry leaves or chopped up twigs on top and be ready to receive a dump of green stuff.  It's all very unscientific, and pretty forgiving, but I generally try to stick to that rule.

 This bin is FULL, and will now sit to cook.  Notice the paper and twigs sticking out from under the wet kitchen scraps of egg shells, tea bags and coffee grounds.  Blech!  It feels kind of weird having you look at my compost - like it's private or something, lol.


This bin is ready for a dump of wet/green scraps.  I've got some of that waiting in a bucket to dump in there as we speak.


Once you have a full bin, stop adding to it and every week or so, take your garbage bin off it's stand, secure the lid WELL with a bungee cord, lay the can down on the ground (with the lid on) and roll it back and forth for a few minutes with your foot.  This mixes the "compost in the making" and gets things heated up in there.  Check your bins for moisture and add water as needed to keep it quite damp but not saturated.   Remember that the holes in the bottom of the cans will let extra water leach out.  Eventually, you'll have lovely loamy finished compost in your bin!  It will be created faster if you roll it & wet it frequently, and keep it in a sunny location.  Experiment!  See what works in your yard.

This morning, I moved my compost bins to a more convenient location - right at my main gate entrance to the garden and hen run.  I walk by there many times each day so I can check it frequently and add weeds and trimmings from the garden very easily.  Plus, when we come to tend to the hens, we can bring both scraps for the chickens and kitchen compostables for the bins at the same time.  Simplifying is a good thing.  Saving time and my energy is even better!

I learned about his composting method online a few years ago and I watched some youtube videos on the topic - maybe check them out if you have a minute to get some ideas.  You can use as many cans as you need, and they are very inexpensive to buy - much less so than buying specially made compost bins.   This method is really easy and it involves no hard, heavy digging/turning.  Plus when the compost is done cooking, you can simply take the can to your garden and dump it out wherever you need it.  Easy peasy!

Berry Cream Muffins


These are absolutely the most tender delicious muffins you will ever taste!  We've been making these for a few years and as they are everybody's favourite muffins, we make them at least once/week.

4 c flour (I use half fresh ground whole wheat)
2 c sugar
2 tsp baking powder
1 tsp baking soda
1 tsp salt
2 c blueberries (reserve to put in last)
4 eggs
2 c sour cream
1 c oil (I use canola)
1 tsp vanilla
lemon zest or lemon extract to taste

Preheat oven to 400F.  Combine dry ingredients in large bowl.  Combine wet ingredients in medium bowl and mix well.  Stir wet ingredients into dry ingredients and then add blueberries, folding until just mixed.  Grease muffin tins and scoop evenly into tins.  Bake for 18-20 minutes checking for doneness after 15 minutes.  You want the tops to be golden brown and slightly crispy, but the insides will be very moist and tender.  Allow to cool slightly and use a fork to pull them out of the tins.  This recipe makes 24 muffins (which only last a day at our house), but for a smaller family, you could half the recipe.

Ready, Set, Grow!

I'm dirty, sweaty and tired, but SO happy to say that the main garden is fully planted!  Today I put the last of the seeds and seedlings in the ground which included:

6 Leader watermelon
6 Charlois melon
20 tomato plants (various Brandywines and Romas)
3 cucumbers
Genovese Basil (in with the tomatoes)
Purple Fava Beans

I began preparing the bed at the south side of the garage where I'll be putting sweet and hot peppers, more tomatoes & basil, lots of garlic and a few flowers as companion plants. It's a very hot spot with full sun all day and with the reflective power of the south facing exterior wall behind the planting area, it's the perfect spot for peppers and tomatoes.  I hope to get that bed fully prepared and planted by the end of the weekend and then I can focus on my deck herb/flower pots and prettying up the place.

I had to resort to watering the garden today as we sadly didn't get the forecasted rain we had expected.  Our growing season is so painfully short, I really don't have the luxury of waiting for natural rainfall to water my newly planted seeds and plants.  I have a little trick though, which is to put a little peat moss in the trench or hole before the seeds/seedlings go in.  This holds some moisture around the seed (or the roots of the seedling) to both aid in germination and prevent dry out of newly transplanted seedlings.  It seems to work rather well, because when I stick a finger in the soil, it's moist down below even if the surface is dried out form the wind and sun.

Kelly hooked up his new to us plow attachment to the diesel tractor and took it for a test run out back in the tree line.  Kelly found a great deal on one locally that was lightly used but in great condition. It will come in very handy here on our property and was a wise investment at only $100.   It does a heck of a job creating the perfect furrow (I could have really used that the other day when I was planting the potatoes!).   We do have extra seed potatoes that I just couldn't fit into the main garden, so I think we'll plow up some grass adjacent to the main garden and get those in the ground.  We've got nothing to lose ~ if they don't grow well, at least we tried ~ I'd hate to throw them out.


I popped in quickly to the thrift shop the other day when I was in town and was pleased to find 2 cases of canning jars for a good price ($3.99/case for the larger ones and $2.99 for the smaller ones).  I'm trying to collect as many as I can now so that when canning time arrives, I'm not scrambling for jars.  That's frustrating and expensive to end up paying full price for jars just because you need them IMMEDIATELY.  I also found 3 stainless steel water bottles new unused condition for $.99 each.  They cost $10 in the stores so buying them this way saves money.  The spots and marks on the bottles are deposits left from our well water which is high in salt. The bottles are in pristine new condition!


What a busy week.  I'm so tired and way behind household work, but it will have to wait because the garden can't!  If all goes well, I'll be done with planting by the end of this weekend, and then I can get caught up around the house again.  All in due time :)

Thursday, 19 May 2011

Fruit!

I am SO excited to see blossoms beginning to form and open on all of our fruit trees.  It was a lot of work to plant them last year not to mention an expensive investment with no immediate payback.    Now is the time when we will start to see the "fruit" of our labor :)  Judging by how many blossoms I see, I think we are in for a pretty good year on the payback front.


 The top picture is a Norkent Apple (the first apple tree to bloom) with a September Ruby and a Sparkle close on it's heels.  I found my first ladybug of the year on an apple tree this morning :)


This plum tree is just about to burst forth in bloom.  It's an unusual tree in that it has 5 types of plums grafted on to the main stock!  See the pictures below...


We didn't get any plums last year, but it looks like we're in for a treat this year! It's going to be great fun to compare and taste all the plums when they are ready to pick :)  First up is Brookgold (the variety that is blooming white flowers now).

We also have an Early Gold Pear and an Evans Cherry (which is a tad tart but not overly sour).  I'm dreaming of cherry pie filling (if I can keep the birds away!).


Here's my strawberry patch - aren't these pink blooms pretty?  My Mom was very kind to bring me some strawberry plants and raspberry canes from her garden in BC in September of 2009.  We had just moved into this house and it was a MESS with hardly anything finished - the house was literally torn apart inside and out and there we were, my Mom and I, planting canes and plants.  It seemed funny then, but given that there was not ONE food producing plant or tree on this property when we moved here a little under 2 years ago, I can see now that that crisp fall day was very significant ~ the official beginning of our homestead :)


Planting Marathon

I was incredibly fortunate to receive a large quantity of seed potatoes from our neighbour recently.  He gardens organically and has done so for a great many years on his land across the road from us.   I am particularly fond of this beauty - he calls them simply "The Blues".  Have you ever grown a blue potato?  Do they change color while cooking?  How are they best cooked (baked, boiled)?


I've been given two varieties of red skinned potatoes, 2 varieties of yellow fleshed potatoes, a purple skinned potato, Russets, Fingerlings and some very interesting seed stock that he bought on a recent trip to Washington state in the US.  That particular potato seed is VERY tiny and yellow skinned, but it looks quite different from any other potato I've seen so I'm curious to see them grow and eventually, taste them.

So ~ on top of planting 240 feet of potatoes, yesterday I managed to plant:

Bush beans (Venture, Landreth, French Heirloom, and one other bush I can't remember)
Peas (Pilot, Sapporo, Hungarian Shelling, Manitoba Bush)
Beets (Red Ace, Bulls Blood, Golden)
Lettuce (20 blend mix)
Spinach (can't remember variety)

.... and my husband helped me plant 320 feet of carrot seed after supper last night (Danvers, Chantenay, St. Valery, Scarlet Nantes).  We had rain forecasted overnight and we wanted to get as many seeds planted as we could to take advantage of it.  Alas, after all that effort, all we got was a very gusty night with just a light sprinkling of rain :(

The mosquitoes are terrible this year. With all the moisture and standing water from such a massive snow melt this Spring, they are breeding like crazy.  I had to resort to spraying my clothing and hat with bug spray while gardening yesterday or there would have been nothing left of me at the end of the day!  I can hear plenty of frogs in the pastures and fields nearby (still lots of standing water) which will help bring down the population, but I'm thinking we need to build a few bat houses to try and encourage them to come and feast near our house.  Any tips or suggestions to help reduce the mosquito population naturally?

This is the gorgeous view I woke to this morning.  You can see the standing water in the pasture just across our road (running horizontally through the centre of the bottom picture).  I can hear thousands of frogs croaking over there, and the songbirds are chirping cheerfully already.  The misty haze over the pasture is the result of that little bit of rain we received last night.  It's beautiful and so peaceful.  I'm blissfully happy to be living here, tucked away from the noise and hustle bustle of city life.  


I'm covered in bites and stiff as a board, hobbling around this morning like a woman much older than 42.  Early spring gardening always rudely informs me of how out of shape I am after a long winter.  My daily 20 minute exercise routine is clearly nothing compared to digging in the garden all day, bending, hauling planting and lifting.  I suppose one of the benefits of gardening is the exercise, and based on how I feel this morning, I can certainly use it   **ahem**

Wednesday, 18 May 2011

Row Covers

I tried growing brassicas last year.  The plants grew well and produced heads, but before they reached the picking stage, a massive, rapid infestation of cabbage moth came in and destroyed the crop.  My huge, healthy plants were decimated in 3 days.  Little white moths/butterflies lay their eggs on the plants and when the eggs hatch, LOOK OUT!  I tried to salvage the cabbage by peeling back the wormy layers, but they were too far gone to save any of the heads.  In chatting with my neighbours who have gardened organically for decades across the road, they recommended using row covers to guarantee a healthy pest free bumper brassica crop without the use of chemicals.  I can attest to their success, as I saw their harvest in 2010.  Their cauliflower heads were the size of large dinner plates and the broccoli was just as big!  I listened and ordered the exact row cover that they used (110' x 5').  It's rather like a lightweight piece of sewing interfacing.  It's air and water permeable, just not bug permeable :)  It lays draped across the planted area and as long as you keep lots of slack in it and don't pull it taught, the plants grow up nicely and lift the cloth up as they grow.  You do need to periodically check the plants to assess their health, but overall, the neighbours said it works with very little effort on their behalf.  You just need to keep an eye on the cloth to make sure it stays pinned down and doesn't get blown up in any area.

Today, I finished planting the last of the brassica seedlings and I seeded another 25' with a variety of seed (all with different maturity dates) with the hope of harvesting a large crop over a sustained period of time.  I want to blanch and freeze as much as I can as we all love broccoli.  The row cover is in place, held down with lengths of rebar and untreated landscape ties (all leftover from our renovation) laying on top of the cloth edges.  Using stakes or U pins to poke holes in the cloth means that it rips and you can't use it year after year.  Apparently with this cloth you can easily use for several seasons if you take care of it.

 Here is one of MANY broccoli seedlings awaiting "tucking in" with the white row cover.


Here's what the row looks like all covered up.  Kind of unattractive, but I'd rather that than no broccoli!  I'm just in the nick of time with this task, as JUST TODAY, I saw three of these little butterflies fluttering around!  Yikes - that was close!


Tuesday, 17 May 2011

300

300 white onion sets in the ground today along with roughly 80' of broccoli and cauliflower seedlings and 2 large packets of corn (Country Gentleman and BiColor).  The peas are soaking for early planting tomorrow (The Pilot, Sapporo, Manitoba Bush and Hungarian Shelling) and I've GOT to get the seed potatoes in the ground tomorrow - they are sprouting like MAD!  Our wonderful neighbours gave us many bags of seed potatoes which I am very thankful for.  It saved a bundle!


The chickens are enjoying their new pasture area and they kept very busy all day trying to get through the fencing to the plants and seeds I was planting!  You can see the the temporary chicken wire and rebar fencing that we use to keep the hens out of the garden.  It's really easy to remove sections of it to allow the chickens in if there is an insect problem.

 This view above is from the outside of the new hen run - lots of green grass!  The coop and the garden are way at the back behind all the green grass.  Our fruit trees are doing well and are leafing out nicely which will eventually give nice shade for the "girls".

Here's a picture from the side closest to the driveway - the raspberries are on the right behind the hens :)

Our lovely neighbours also gave us 50lbs of potatoes for eating that were leftover from their winter storage.  What a gift!  We've been eating lots of them this week in many different dishes.  Our favourite (other than mashed) is Chip and Egg.  We fry or roast seasoned diced potatoes until crispy, then top with fried eggs from the hens.  Served with bacon or sausage and fruit, it's a delicious meal that is very comforting.

I'm exhausted and need to head off to bed but I wanted to show this picture of the eggs we  collected today.  We are noticing a lot of long slender eggs from the heritage breeds.  They really aren't smaller than usual, just a very different shape.  Also, notice the wrinkled egg on top - funny!


Boy, I am certainly not getting any younger - my back and my legs are stiff after all that hunching and bending over planting today :)  It sure feels good to get some lovely seed into the warm soil, though.  I hope you all had a productive and satisfying day today.  Tomorrow brings new challenges and much joy - if you look for it!

Monday, 16 May 2011

It's All Coming Together

We've been working hard and it's paying off!  The place is looking tidier and more finished every day which is such a relief.   Still a long road ahead of us, but at least we don't feel like we're being chased anymore.  Whew....

The strawberry bed needed some attention and after a good weeding and clean out, I was pleasantly surprised to see that we didn't lose many plants over winter.  Late last fall, I piled the bed high with leaves and spent sweet pea vines to act as an insulator from the cold.   After I cleaned the bed out, I added some peat moss to the soil (which seemed a bit on the clay side) and worked it in gently.  I planted our 4 new plants to replace the ones that died and top dressed with compost.  Once the berries begin to form (and the plants get a little bigger) I'll put some straw down as a mulch.  It works really well to keep weeds down plus it gives a nice clean place for the berries to rest without rotting like they do when they sit on the bare soil.  It's horrible to pick a big luscious berry and discover that the back side is totally rotten from sitting on the ground!


I pruned back the raspberry canes, removing the old canes that fruited last year and pulled away the winter straw mulch to reveal the new suckers coming up all around the original canes.  I'm half way done weeding the area, but I'm guessing that the chickens will help me finish the job.  The "girls" moved into their new hen run (our orchard) today and their newly appointed positions of Bug Eliminators and Weed Controllers" were taken on most enthusiastically!  I know that we won't have many berries to pick at the lower levels of the canes due to them "eating on the job", but that's ok, we can share a little.   The chickens love anything red - berries, tomatoes, apples, etc.  If you keep chickens, do yours like red foods?


I planted our 3 hanging baskets and the 3 large pots out in front of the garage with some annuals.  I don't plan to plant many more flowers than that this year (other than some good companion flowers in the veggie garden) as my primary focus this year is upping our food production.  In the past, I have purchased pre-planted hanging baskets at Costco for a decent price of $15.00, but I wanted to plant my own this year hoping to save a little money and get the colors I wanted.  I saved the sturdy peat (?) baskets from last year and simply replanted them with fresh potting soil and annuals purchased inexpensively.  Next year, we hope to have our greenhouse up and functioning and I'll have much more space to start flowers as well as the veggies.  We just don't have room in the house for more seedlings!

We received a call late last week from friends asking if we wanted to come and pick up 15 bags of leaves from last fall that they never got around to taking to the city compost facility.  Of course we wanted them!  They also had a garbage can full of compostables ready for pick up (we keep a lidded garbage can at their place to collect compostables).   Kelly picked it all up with our trailer on Saturday and tilled everything into the garden right away as it was all halfway rotted.  When we add things to the garden that aren't fully composted, we usually need to add a bit of blood meal to the garden to replace the nitrogen that gets used up in the decomposition process.  It works wonders and is a time saving (lazy?!) solution that involves no chemicals.  We won't be adding anything more in the way of organic matter to the garden now that we are seeding so all compostables will now go into our system of rotating compost (garbage) cans.  More on that another day :)

Remember when we cut sod a week or so ago to expand the garden?  I used upside down sod last year as paths in my veggie garden and it worked really well so I plan to do the same this year.  The sod gradually composted down all winter and by spring, it had disappeared entirely.  The perfect frugal solution that suppresses weeds like nothing else!

After I put my sod paths down tomorrow, I'm going to lay out my network of soaker hoses.  Last year, I laid out the hoses over the entire garden and I did not ONCE need to turn them on!  We had the perfect amount of rain and combined with effective mulching, not a drop of water was applied to the garden all summer (after the germination period).  I think that if I neglect to lay the hoses this year, I'll regret it, as it gets HOT here in summer and it's generally very dry (humidity wise).  It's a challenge to wrestle with them and lay them down once the seeding is done and even harder still when there's new tender plants to work around.


We have had (literally) gale force winds here for 5 days straight making it impossible to seed the garden.  It's so windy, the dirt and grit from the neighbouring field was actually blowing into my eyes!   The 2 pictures you see above are an interesting contrast - it's hard to believe it's the same property :)

Top -  The current view from the back corner of our property  
Bottom - The same field in July of 2010 awash in the breathtaking colour of canola in full bloom.

Speaking of full bloom, tomorrow we have a forecasted break in the wind (I hope), so Planting Day has finally arrived!  Yippee :)

Thursday, 12 May 2011

Investing in Good Equipment

This is a bit of conundrum for those of us trying to live frugally. We have seen time and time again, how buying a cheap piece of equipment can and does cost so much more in the long run.  Replacing or having to repair an item far before we should have to is a total waste of money and time.  When you factor in these additional costs it really isn't cheaper to buy the least expensive product.

Comparison shopping for a bigger ticket item is a lot of work but once again, it's part of my job as Homekeeper.  I do most of the leg work; researching consumer ratings, checking forums for feedback and user reviews, comparing features and also looking at where the various products are manufactured and with what materials.  Warranty and after sale service is also important.  When you need service or a part, you want to be dealing with a company that a) still exists and b) has a good service reputation.   All of these issues, coupled with price and value for money factor into our purchase decision.  As you can see, the choice is usually not easy!   The time we spend researching a purchase is directly related to the amount of money invested.   Investing hours of my time on a $50 purchase makes little sense, but a $1000 purchase demands considerably more research.

When it was time to replace our trampoline, we did a week's worth of research, and settled on a trampoline that was more than double the cost of our first one.  This has proven to be a wise investment, as it's now 3 years old and we haven't had to replace a single part on it!  It's as good as new.  Our old trampoline cost us MORE than the new one when we added in all the replacement parts we bought for it over it's 6 year lifetime.  Not to mention the value of our time, having the tramp down, sourcing parts and paying for exorbitant shipping rates.  Lesson learned - get a quality product from the get go.


Yesterday, our trusty coffee/espresso maker of 14 years stopped working. Kelly is incredibly handy and can usually fix anything - but this time - no go.  Time to replace it.  Enter - total disappointment and confusion!  There are a lot of coffeemakers on the market and I'm overwhelmed.  Have any of you bought a coffee/espresso maker recently that you are really happy with?  We prefer a machine that brews at a hotter temperature (closer to 200 degrees) and we also really like the espresso/frother for our weekend cappuccinos and lattes.   I'm wrestling with my desires, our budget and available features.  Help!

I'm all ears!  Share your suggestions!  :)

Wednesday, 11 May 2011

Home Comforts

Making our home both comfortable and comforting for everyone in the family takes a little thought and advance preparation but I feel that it's well worth the effort invested.  A comfortable and comforting home is truly a joy for all who reside in it.  I have chosen to remain at home to raise and educate our children, keep the house, garden for food production, manage meals and the household.  It is a choice made by me, but it is not expected of me.  It's a huge responsibility to run a home efficiently, and it takes considerable focussed effort to create an environment that our family thrives in.  Is it work?  YES!  Is it meaningful?  Absolutely!    

My husband, who is away from our home for 13 hours each work day, is greatly comforted at the end of the day by greeting the family and pets, walking into a reasonably  peaceful environment and having a delicious home-cooked meal to eat.  He does not expect this of me, he simply appreciates and enjoys it.  He is currently the "bread winner" in our family, working to support all 7 of us.  That's a choice for him, too ~ one that I am grateful for and appreciate deeply.  It's simply common sense to me, to put a little effort into making his daily homecoming pleasant and enjoyable as a show of my appreciation for his hard work.  He takes his job of providing for the family very seriously, going into work faithfully day after day when I know there's days he'd really rather not.  Our areas of expertise and our job descriptions are VASTLY different, but we both work very hard at our chosen jobs all for the family unit as a whole.

Home Comforts generally don't cost much (if anything).  They are usually paid for in thought, effort and time.   In no particular order, some small Home Comforts that my family appreciates are:

* a reasonably predictable routine with key anchors in the day for meals and bedtimes (there is much comfort in routine)
* freshly washed bed linens (all the better if line dried!) to snuggle up to after a long day
* delicious home cooked meals with comforting aromas to welcome everyone home
* fresh garden produce and eggs from our hens
* "from scratch" home baking
* a reasonably tidy and organized home (we aren't perfect, but we strive for tidy)
* a relatively clean home (not perfect but not filthy)
* a garden filled with good food and some flowers (comforting for all senses)
* a cozy fire and candles in winter (to warm us through our long winters)
* open windows and fresh air blowing through in summer (fresh clean air is such a tonic)
* clean clothing and clean towels (so nice to have fresh, clean linen and clean clothes to wear)
* good scents throughout the home.  The use of natural aromatherapy oils and essences can be very comforting and soothing
* having a stockpile of food and basics so that we don't ever run out of what we need
* preparing seasonal foods such as a hearty stew on the first frosty day (not many want to eat a hot stew on a blistering summer day)
* favorite foods on a family member's birthday (they all love this!)
* full cooked breakfasts on weekend mornings

By no means is this an exhaustive list, it's just a few things off the top of my head that I know my family appreciates (myself included!).  Do I do all of this myself?  Of course not!  We are a family and we all work together to make our home function and comfortable  ~ each pitching in to do our part. Lest you think this describes a perfect home and a perfect family, you are very wrong!  We have more than our share of things that go wrong, tasks left undone, more work than day, and of course, some not so pleasant homecomings.  Life is real here, in fact, if you popped into my home right now, you'd wonder if I'm crazy posting about Home Comforts.  Things are a mess here due to several emergencies popping up this week.  I have learned this week (without question), that the value of a comforting home is real.  I miss my routine and we all are missing the simple comforts that we haven't had time to create this week.  We STRIVE for a comforting home, and get as close as we can each day given the curve balls that are thrown each day.

Never underestimate the power of Home Comforts.  They are part of the attraction and lure of the home for us all.  When I've spent a day in town running errands, I can't wait to get home and relax with a cup of tea at home.  My husband thinks all day long about getting home to see his family and having a nice supper with us.  My boys come home from work and school, each counting on something good to eat, knowing that their friends are always welcome to tag along and share our meal.   My younger kids LOVE to come home to play and rest in the hammock, unwinding after a day in town or a sport practice.  Home is always a place where we all want to be as it nurtures us and sustains us, providing comfort in so many ways.

Home Comforts may look very different in your home depending on your lifestyle, your taste, your roles in the home, the season and even your climate.  What works for us, may be very unappealing to you and your family and that's ok :)  What are YOUR Home Comforts?  Do share!

Monday, 9 May 2011

Garden ADD

Most of you have probably heard of Attention Deficit Disorder.  I've got it in a BAD WAY when it comes to the garden!  I flit from one activity to another, excited, inspired and motivated, accomplishing far less than I should, but having a ball nonetheless :)   *sigh*  It comes every Spring, when all the winter's worth of cumulative longing for soil between my fingers and plants to tend to comes boiling to the surface.  It lasts for a few weeks, and finally settles down in June.  Anyone else struggle with this affliction?

Now that the new hen run is ready for wire fencing (thanks to my wonderful family), I can get the chickens moved into their new space by this coming weekend.  This in turn means that I can plant my newly expanded, large main garden VERY soon!  Typically, we aim for May Long Weekend (which is coming up on the 21st) as it's the usual last frost date.  I'm eying the long range forecast and things look pretty good!  I'll be getting the cold tolerant crops in right away (carrots, peas, onions, spinach, etc) and hold off on the tender plants until close to the end of the month (beans, tomatoes, squash, cucumbers, etc.).

The hens are busy, busy, busy scratching and pecking in the freshly tilled soil where my garden will be.  They're eating bugs, worms and grubs galore, doing a wonderful job of pest control in preparation for planting.  I'll be using rebar posts, chicken wire (already on hand from last year) and tywraps to keep the chickens out of the garden once I seed (much to their annoyance!).   This temporary barrier worked well last year, and it gives me the flexibility to let the chickens in to the garden should I need them for organic pest control at any time in the growing season.  I'm considering fencing the garden in such a way that the chickens will have full time access to the corn patch (once it's established).  I'm guessing it will give them some great shade and the nitrogen boost for my corn will be helpful.  Does anyone know if this practice would burn the plants?  The new hen run is large enough at 100'x25' (not counting the corn patch) that the hens will have plenty of room.  Do you think this practice will be too risky in terms of hot manure/nitrogen burn?  Your thoughts on the matter, if you care to share?

The "Before Planting To Do List" is a mile long, but the priority remains to:

1)  place new hoop house to get the seedlings out of my house (more on that soon!)
2)  buy the wire fencing for the hen run
3)  install it
4)  erect temporary fencing to separate the garden from the hens
5)  tweak the plot plan
6)  buy seed potatoes

I'm sure there's more but as my Garden ADD is in full swing, I can't remember! :)

Sunday, 8 May 2011

Happy Mother's Day!

Imagine my surprise when my husband and 3 boys took the bull by horns and worked ALL DAY to prepare our new hen run!   This means that I can take over the old hen run for my expanded garden right away, which thrills me to no end!   They devoted the entire day to working on this as my Mother's Day present and I am so happy :)  They all had many other things they would have rather been doing, so the gesture was very significant to me.

This is what they accomplished on one day:

a)  rented a post hole auger and then had to go back to the store to get the auger bit exchanged because they sent the wrong one with the auger.  URGH!
b)  dug out 20 post holes
c)  bought 20 posts
d)  set 20 posts in concrete


Whew!  That was a huge amount of work and I am so proud of my family.  What a meaningful gift to me - the gift of time and effort.  As well, my oldest surprised me with this lovely bouquet - I'm in 7th heaven!


Wishing each of you a wonderful day filled with family, laugher, gratitude and love.   Thanks to my own dear Mother, Lynne for your love and unfailing support.  I love you very much.  :)

Friday, 6 May 2011

Tilling

Well, today was the day!  Hubby was out working a sod cutter early this morning to make our garden larger.  He had finished well within the allotted 4 hour time frame which meant that we didn't have to pay any extra money on the tool rental.   It was well worth the $60.00 rental fee, as we would have been working for DAYS to dig that hard packed, compacted sod out by hand.  It just wasn't efficient use of our time with a "to do" list a mile long, so we felt that $60 was a bargain to get the help that that piece of equipment gave us today.

We decided to take over nearly all of the existing hen run as the new garden extension and relocate the hen run to a very large grassy area under our fruit trees.    It just makes sense to do that as the fertility will be higher in the old hen run than on a patch of new ground.  Also, the hens will do a superb job of keeping insects at bay in our little orchard, all the while fertilizing the soil.  The fruit trees will in turn, provide shade for the chickens which they need on our hot summer days.  All around it's a win/win situation.

This decision will effectively double our food growing capacity, all conveniently within the existing fenced area.  We will have to put in more posts ($4.00 each) and buy more wire fencing ($200.00 for 2 rolls) to extend the hen run in the new direction, but as we will do all the work ourselves, we will save on labor.  The cost of the wire and posts will be offset by the benefit of having the fruit trees fertilized organically (plus effective insect control) not to mention the expected doubled vegetable harvest in the bigger garden!  Well worth the $250.00 that it will cost.  Naturally, that cost will bring benefit for more than just this one growing season, so that has to be considered, too.

After the sod was cut, our daughter and 2 friends helped to roll it up and haul it off the garden area.  The chickens realized (quickly) that many worms were hiding underneath the sod and the race was on to eat them all.  The sod rolls will sit through the summer and in the fall, the rolls will be unrolled and placed upside down over a patch of land that we want to develop as more growing space for the following year.  Over winter, it will kill the grass underneath it, and rot under the snow, amending the soil nicely.


One the sod was removed, hubby went to town shallow tilling the entire area with the small tractor (both the old garden and new garden where the sod was removed from the hen run).  He tilled in all the manured straw from the chicken coop that was laying out on top of the garden.  The chickens went CRAZY for the newly tilled soil and followed along behind my husband over his many passes through the garden eating bugs, worms and scratching up all manner of insect larvae.  Good job, girls!  I'll let them naturally clear the garden of bugs this week and all will be ready for planting very soon.  It's wonderful to have a natural solution to garden insects - especially one that fertilizes and lays big beautiful eggs!

After all that tilling, Kelly set to work putting our summer wheels and tires on the truck.  We recently bought a second set of wheels for the truck so that we can do our own seasonal wheel/tire changes.  In our climate, we need both winter and summer tires.  It's a hassle and expense to go in to a shop to have tires changed 2x/year, not to mention the huge waste of time sitting in a shop for a few hours waiting (particularly with kids in tow).  Kelly found these wheels second hand (in virtually new condition), and got them for a mere fraction of their value (equivalent to the cost of ONE tire changeover at a shop!).  Our summer tires will be permanently on the black wheels and the winter tires will remain on the aluminium wheels.  Kelly can simply switch wheels each season and not pay for having tires taken off and installed on the one set of wheels each season.  This will save us a lot of money in the long run, as he can now do all of our seasonal changes in future at home in our garage.


While Kelly was busy working on the wheels, I made supper with our youngest son, Reece.  We made homemade grilled cheeseburgers with some lovely lean ground beef from what's left of our beef side from last year.  We have a new side coming, so we need to use up the little bit that we have left in the freezer.  We were all ravenous after such a busy day of work outside, so we gobbled them up hungrily, satisfied with a full and productive day on our homestead :)

Thursday, 5 May 2011

Avoiding Temptation

I must preface this post with a disclaimer :  I don't like food shopping!  I would rather do just about any other chore including cleaning a dirty bathroom.  I find the crowds and the lineups really fatiguing and it seems to take so much precious time away from my life.  I much prefer to stick around our homestead and work in the garden or around the house as that kind of work is infinitely more satisfying to me.  However, supplying our family with quality food and stocking up on ingredients at good prices is an important part of my job that can't be avoided.  The food bill is our single highest expense AFTER our mortgage, so it is a budget category where I have a lot of responsibility to work hard at applying frugal principles.

Today, I had no choice but to make an unexpected (undesired) trip into the city.   I made the last minute decision to incorporate a Costco shop into my day to make good use of my travel time and gas money.  For those of you who don't recognize that name, Costco is a popular warehouse/wholesale store that sells food and household items, sporting goods, electronics, furniture and even jewellery.  I'm quite sure that they sell nearly everything that you could possibly think of!  I was most fortunate to have my 18 year old son along for the trip, so I took full advantage of that and stocked up on the heavy items that would normally be challenging for me to shop for and load into the truck alone.  What a treat to have help wrangling the heavy cart and lifting all the huge sacks and cases of food!

In the interest of sticking to our budget and conserving time, I usually try very hard NOT to browse all the aisles.  Today, we had enough time to look around a little bit, and while there were some useful things (and I will be honest, things I WANTED), most of "the extras" offered at Costco really aren't necessary for us to have.  I know that if I was to invest in some of those things, I may be temporarily pleased with my purchase, but I know in my heart that the money would be wasted as the items would end up given away or broken before long.  It takes a pretty durable, functional, well made article to make the cut and stick it out around here :)  We are hard on our things as we use them frequently and fully with 7 people in the house.  I am pleased to say that I didn't buy anything unnecessary today and as we went without a fully prepared list (due to the last minute nature of our trip) that is an impressive feat!

A few tips that help me stick to my budget at Costco:

1)  I never/rarely buy produce there as it is over packaged, expensive and usually not organic.

2)  I stick to buying staples ONLY and avoid all prepared/convenience foods.  Those are generally unhealthy, expensive and also very over packaged.

3)  I check the coupons at the door and the end caps (the feature spots at the end of the aisles where the good deals usually are) to take full advantage of lower prices.  As an example, if peanut butter isn't on my list, but is a very good price, I'll likely stock up on 6 months worth as we will use it before it spoils.  Any staples (olive oil, pasta, tinned goods, etc.) that are offered at a very low price, I will buy unless I have a large inventory at home already.

4)  I avoid the personal care aisles (toothpaste, liquid soaps, lotions, deodorants etc.) as they are full of highly unnecessary products that are full of chemicals.  Additionally, I find the prices on these items to be higher than what I can source at my local supermarket or make myself for pennies. Again, it's all over packaged.

Costco counts on the fact that you will cave in and do all your shopping there, getting everything on your list to avoid making another stop at a cheaper store.  That gives them a chance to make good money off of you!  I have learned to NOT stop at my local supermarket on the way home to pick up those last few items as I am usually far too tired to avoid impulse buys and make intelligent choices that are good for the budget.  I take my Costco goods home, get them unpacked and put away, saving the supermarket run for another day when I'm in our town close to home and am in a fresher state of mind.  That mind set saves us a lot of money!

Today we spent just under $508.00 and I brought home hundreds of pounds of wholesome ingredients.  I won't be back there for another 3 months (or longer), so I made sure to stock up on the items that I will not/can not get anywhere else.   I didn't succumb to impulse and left with nothing that wasn't considered a staple ingredient/necessary purchase.  Three cheers for success!!!

Wednesday, 4 May 2011

Transplanting Seedlings and Local Conditions

The time came to transplant some of our seedlings so I set to work with 2 hours of uninterrupted time yesterday when the three younger kids were at Art class.  The new little plants just weren't thriving ~ they seemed to be struggling to hold their own.  I wonder if they are getting too hot in our sunny window?  As our temperatures have skyrocketed, that bright window actually gets HOT by midday.  Some of the first leaves were a little dried up and crispy but the first true leaves were okay.  I'll keep a closer eye on that in the coming days and adjust the window shades accordingly at midday.


I am nearly out of plastic pots, so I'll have to see if I can source some on freecycle this week.  I picked the strongest of the seedlings to transplant, tossing the weak and weary looking ones into the compost.  That is a very hard thing for me to do as my nature is to keep every lame, struggling plant and give it lots of TLC to help it along.  Is anyone else like that?  It's a tough urge to resist :)   The seedlings will stay indoors for a while yet, as we are still getting hard frost most nights out here in the country.  Daytime temperatures are lovely and warm, with lots of sunshine, however!


The seeds that I planted in the cold frames a week ago are finally starting to pop up!   I'll be succession sowing some more of them to ensure a steady supply of greens until the main garden is producing.  I'm so eager to taste a lovely tender salad made from homegrown greens ~ what a treat compared to what is available in the stores all winter.  Once we have our south facing greenhouse built, I'm hoping to be harvesting greens from it right up until December and as early as March.  A girl can dream :)

Kelly is busy putting together some portable hoop houses for me (more on those in a few days) so that I can get the many seedling trays outside and take back our living room :)   The hoop houses will do nicely to extend the growing season into the fall as well, perhaps allowing us to leave tomatoes on the vine a little longer without the threat of frost and heavy dew causing mildew.   I've just realized (literally, right now) this means I need to plant the tomatoes strategically to accommodate fitting the hoop houses overtop them.... hmmmmm....   back to the plot plan...


Most of our fruit trees and berry canes are confirmed "Alive" which thrills me to no end!  I was worried about that as our winter was exceptionally cold, much snowier and considerably longer than usual.   I was fretting about losing the investment (and also the years growth) not to mention the gruelling hard work of planting!  The soil around them is at last drying out and as weeds and grass are already growing rapidly at the bases, this proves the richness of the loamy soil around their little trunks.  When we planted the trees, we used some incredible soil that was dug from the bottom of an old dried up pond.  What a find!  It was very nutrient rich and incredibly loamy - absolutely perfect soil in every way.  Oh, to have a load of that soil again.  As you can see, I MUST get that grass pulled from under those trees as soon as I can or it will spell trouble for those young fruit trees.


A thought on my mind about current local conditions...  We have massive (and in some cases catastrophic) flooding here in agricultural fields and pastures as a result of the melt of our heavy winter snowfall.  We've not had trouble on our property with standing water (other than some near the fruit trees for a few days), but certainly in many fields, the flooding is significant.  It actually looks like we have a lake across our country road (the land is an agricultural field).  I am told that planting canola (a main agricultural crop here) is now not possible for many farmers due to these conditions persisting so late into Spring.

It occurred to me today, that *maybe* the use of chemical fertilizers has contributed indirectly to the flooding.  Generally speaking, most "conventional"/modern day farmers here use these substances instead of amending the land with manure and tilling in fall crops to add fertility to the soil.  While these chemicals may add manufactured nutrients (chemically) to the land, they do nothing to improve the condition and texture of the soil which therefore improves the water retention of said soil.  I've seen myself how amended soil absorbs water like a sponge whereas depleted soil does not have that capability - the water runs off or stands on top.  We actually receive less snow now than we did a generation ago, so I'm not sure that the amount of snow is the true big picture problem.  I'm guessing (and it is only a guess) that the soil is simply not able to absorb the water because it had lost it's ability to do so effectively.  I am curious about my unscientific and uneducated conclusion.  Again, I am not a farmer, nor am I schooled in this field.  This is simply my thought upon observation as a lowly organic home gardener. Thoughts?


Off to enjoy a homemade blueberry muffin.  They never last long, so I'll enjoy it with a strong cup of coffee while I can :)