Just over a week ago, Kelly and I attended a cob oven workshop together. It was a long day full of hard work, but we are very glad that we had the opportunity to learn from experienced natural builders. Ashley Lubyk and Heather Noakes together own and operate Dirt Craft Natural Builders and we highly recommend them! They are extremely knowledgeable and very experienced having travelled the globe to learn about different techniques and types of materials used in natural building.

We began our day with some theory... what a great classroom, no? While we learned, we listened to the chickens clucking, the cows mooing and the birds singing at Good Note Community Farm.
Below, you will see the foundation that the farm owners had constructed on their own using rocks and clay from their land. A simple concrete slab was used to create a nook for storing firewood and with clay, sand and straw mixed together, they created a base on which to sit the cob oven.

Below, Ashley Lubyk (our instructor) is teaching us how to assess the clay (found on site) to determine how much sand to add to it to make good cob.

We were really quite surprised how MUCH sand we had to add to make strong cob. It's always best to add as much sand as the clay will take, as the sand is what gives integrity and strength to the cob. Speaking of sand, uniform washed sand is NOT best... you want rough, unequal particles for the best strength.
Below, Ashley holds up the result of finding the sweet spot - just the right mix :) When you throw a cob on the ground, it should flatten a tad on the bottom, but not splat or fall apart. Also, no major cracking!

Once we had the mix right, we all set to work mixing up cob on tarps with our feet. We ended up using 7 tarps full of cob in the end with each tarp holding one 5 gallon bucket of clay, 3.5 buckets of sand and enough water to mix it thoroughly. It was surprising how long it took to mix each batch! Below, is Kelly with our fellow "cob mixer", LOL. I have no pictures of me, as I was in charge of the camera all day!

First step, was to level off the previously made base with sand and then lay some firebricks flat and perfectly level to create the inside bottom cooking surface of the cob oven. After that, a large dome of wet sand was created (sandcastle style) to form the shape of the cob oven (a mould essentially). Wet newspaper was placed on top so that it would be easy for the owners to know when to stop digging the sand out of the oven cavity when it's done curing.

Here's Kelly with the completed mould all covered with wet newspaper - READY FOR COB!

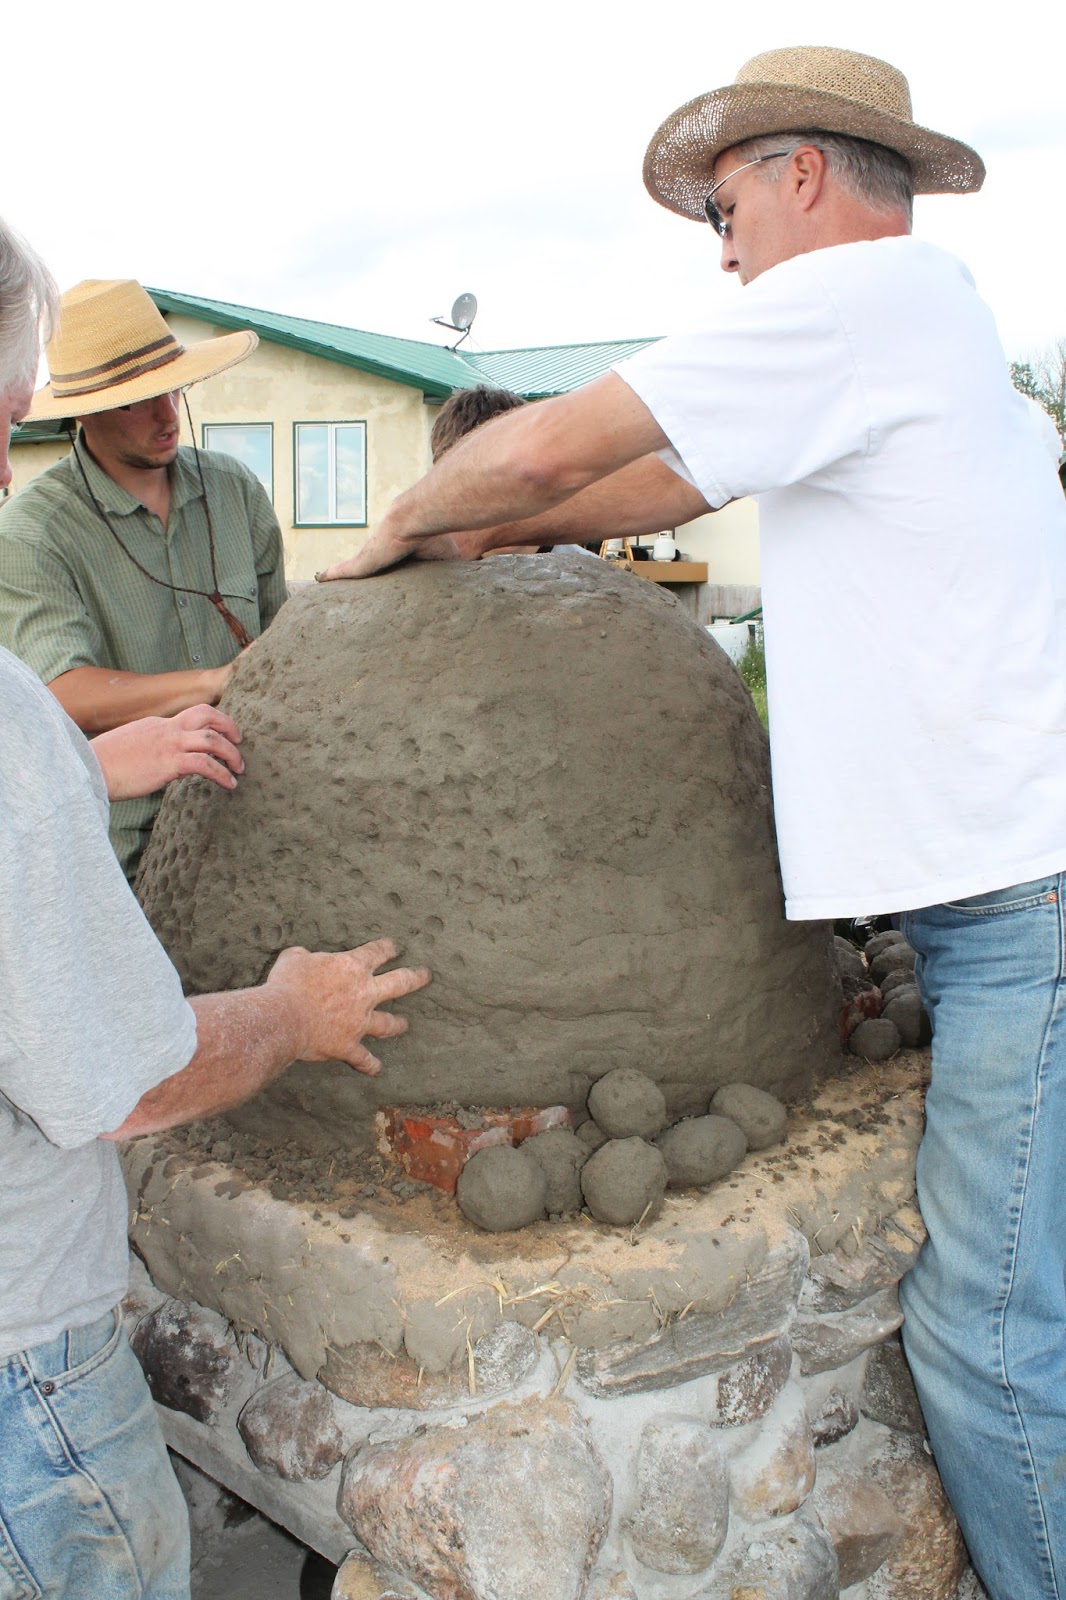
Below, is the cob application. Cob is never slapped or pushed, it's kind of chopped down into place with the side of your flattened hand - starting from the bottom of the oven and working up. While making that motion, your other hand is supporting the cob on the outside so it doesn't push out. The first layer was about 3" thick.
Next, was the cob/straw layer which was about 4" thick. The straw added a bit of integrity for good measure.

Next, the straw layer was pressed and "finished" by Ashley using a 2x4 in a rocking motion.

Following that, we layered burlap overtop of the oven and then poured clay slip over the entire surface.

Here's Heather Noakes mixing clay slip (clay/water slurry) to pour on top.


The slip was quite literally, poured on top and rubbed in to smooth the surface.

Lastly, an insulative layer of cob and wood shavings was added to provide some valuable insulation to keep the heat IN the oven and prevent the outside from being hot to touch (sadly no pics of that, I was COVERED in clay and didn't want to touch my camera). If I remember correctly, one last slip layer was poured on top... WHEW!
In the end, the oven turned out GREAT and we learned a ton. Nothing like being shown something in person! We did choose to buy a book that our instructors recommended as it's going to prove REALLY handy to have that resource on hand when we are building our own oven.
Stay tuned for that post... we hope to start on the foundation this month!
What a fascinating post Sherri, you explained and illustrated it so clearly! Thank you. I look forward to hearing about your own developments.
ReplyDeleteThanks, Rose! It was a fascinating day. Turning natural materials found on site into a useful and beautiful oven is an unbelievable process. Once the oven is fired and warmed up, pizzas cook in 3 minutes (at around 700F) and then, 6 or more hours of cook time remains... a stew, a roast, some bread, a cake, buns, etc... A wonderful thing it surely is to obtain cooking heat for so long with just a little bit of wood (and I can cook while gardening - woot!).
Delete3 minute pizza and cooking all day between gardening - that would be so neat!! Building one looks like a ton of fun, like a grown up version of huge sand castle building and paper mâché.
Delete-Jaime
Wow! This is so interesting. I did a google search on Cob and found out houses have been built for centuries, using cob. I'm looking forward to another post when you build your own cob oven...
ReplyDeleteYes, Meggie, you're right. There are cob buildings in England still standing strong and proud MANY hundreds of years later.... Cob is incredibly durable IF the foundation and roof are sound. They call that having good "boots" and a good "hat" :)
DeleteLooks like you are learning a lot Sherri, will be great when you can design your own things from what you learn.
ReplyDeleteSounds like you are having a lot of fun along the way...
x
Amazing information I found here. I already read few more articles in this blog. They are really nice. Thanks for sharing this post.
ReplyDelete